What Is AuthSec Agent Shield?
AI coding tools — Claude Code, Codex, Cursor, OpenClaw — run directly on your machine with access to your terminal, filesystem, and cloud credentials. When an AI agent runs rm -rf, git push --force, or DROP TABLE users, by the time you notice it's already done.
AuthSec Agent Shield is a single binary that installs at the OS level and intercepts every risky command before it executes. It scores each command locally, with no network call. Safe commands (git status, docker ps, ls) pass instantly with zero latency. Dangerous commands push a notification to your phone. You approve or deny. Then it executes — or doesn't.
This guide walks you through the full setup: building the binary, logging in, installing the four protection layers, and verifying everything is working.
Prerequisites
Before you start, make sure you have the following:
- Windows 10/11, macOS, or Linux.
- Go 1.22 or later installed (to build from source).
- An AuthSec account — your admin provides your client ID.
- The authsec-agent-shield source code cloned locally.
Step 1 — Build the Binary
Start by cloning the repository:
git clone https://github.com/authsec-ai/authsec-agent-shield.gitcd authsec-agent-shieldThen build the shield binary for your platform:
go build -o shield.exe ./cmd/shield/go build -o authsec-shield ./cmd/shield/This produces a single self-contained binary. No external dependencies are needed at runtime.
Step 2 — Configure with Your Client ID
Run the setup command with the client ID your AuthSec admin gave you:
.\shield.exe setup --client-id <YOUR_CLIENT_ID> --base-url https://prod.api.authsec.ai./authsec-shield setup --client-id <YOUR_CLIENT_ID> --base-url https://prod.api.authsec.aiThis stores your organization's configuration locally. The base URL points to the AuthSec API that handles push notifications and approval routing. You only need to run setup once per machine.
Step 3 — Log In
Run the login command to authenticate your user account:
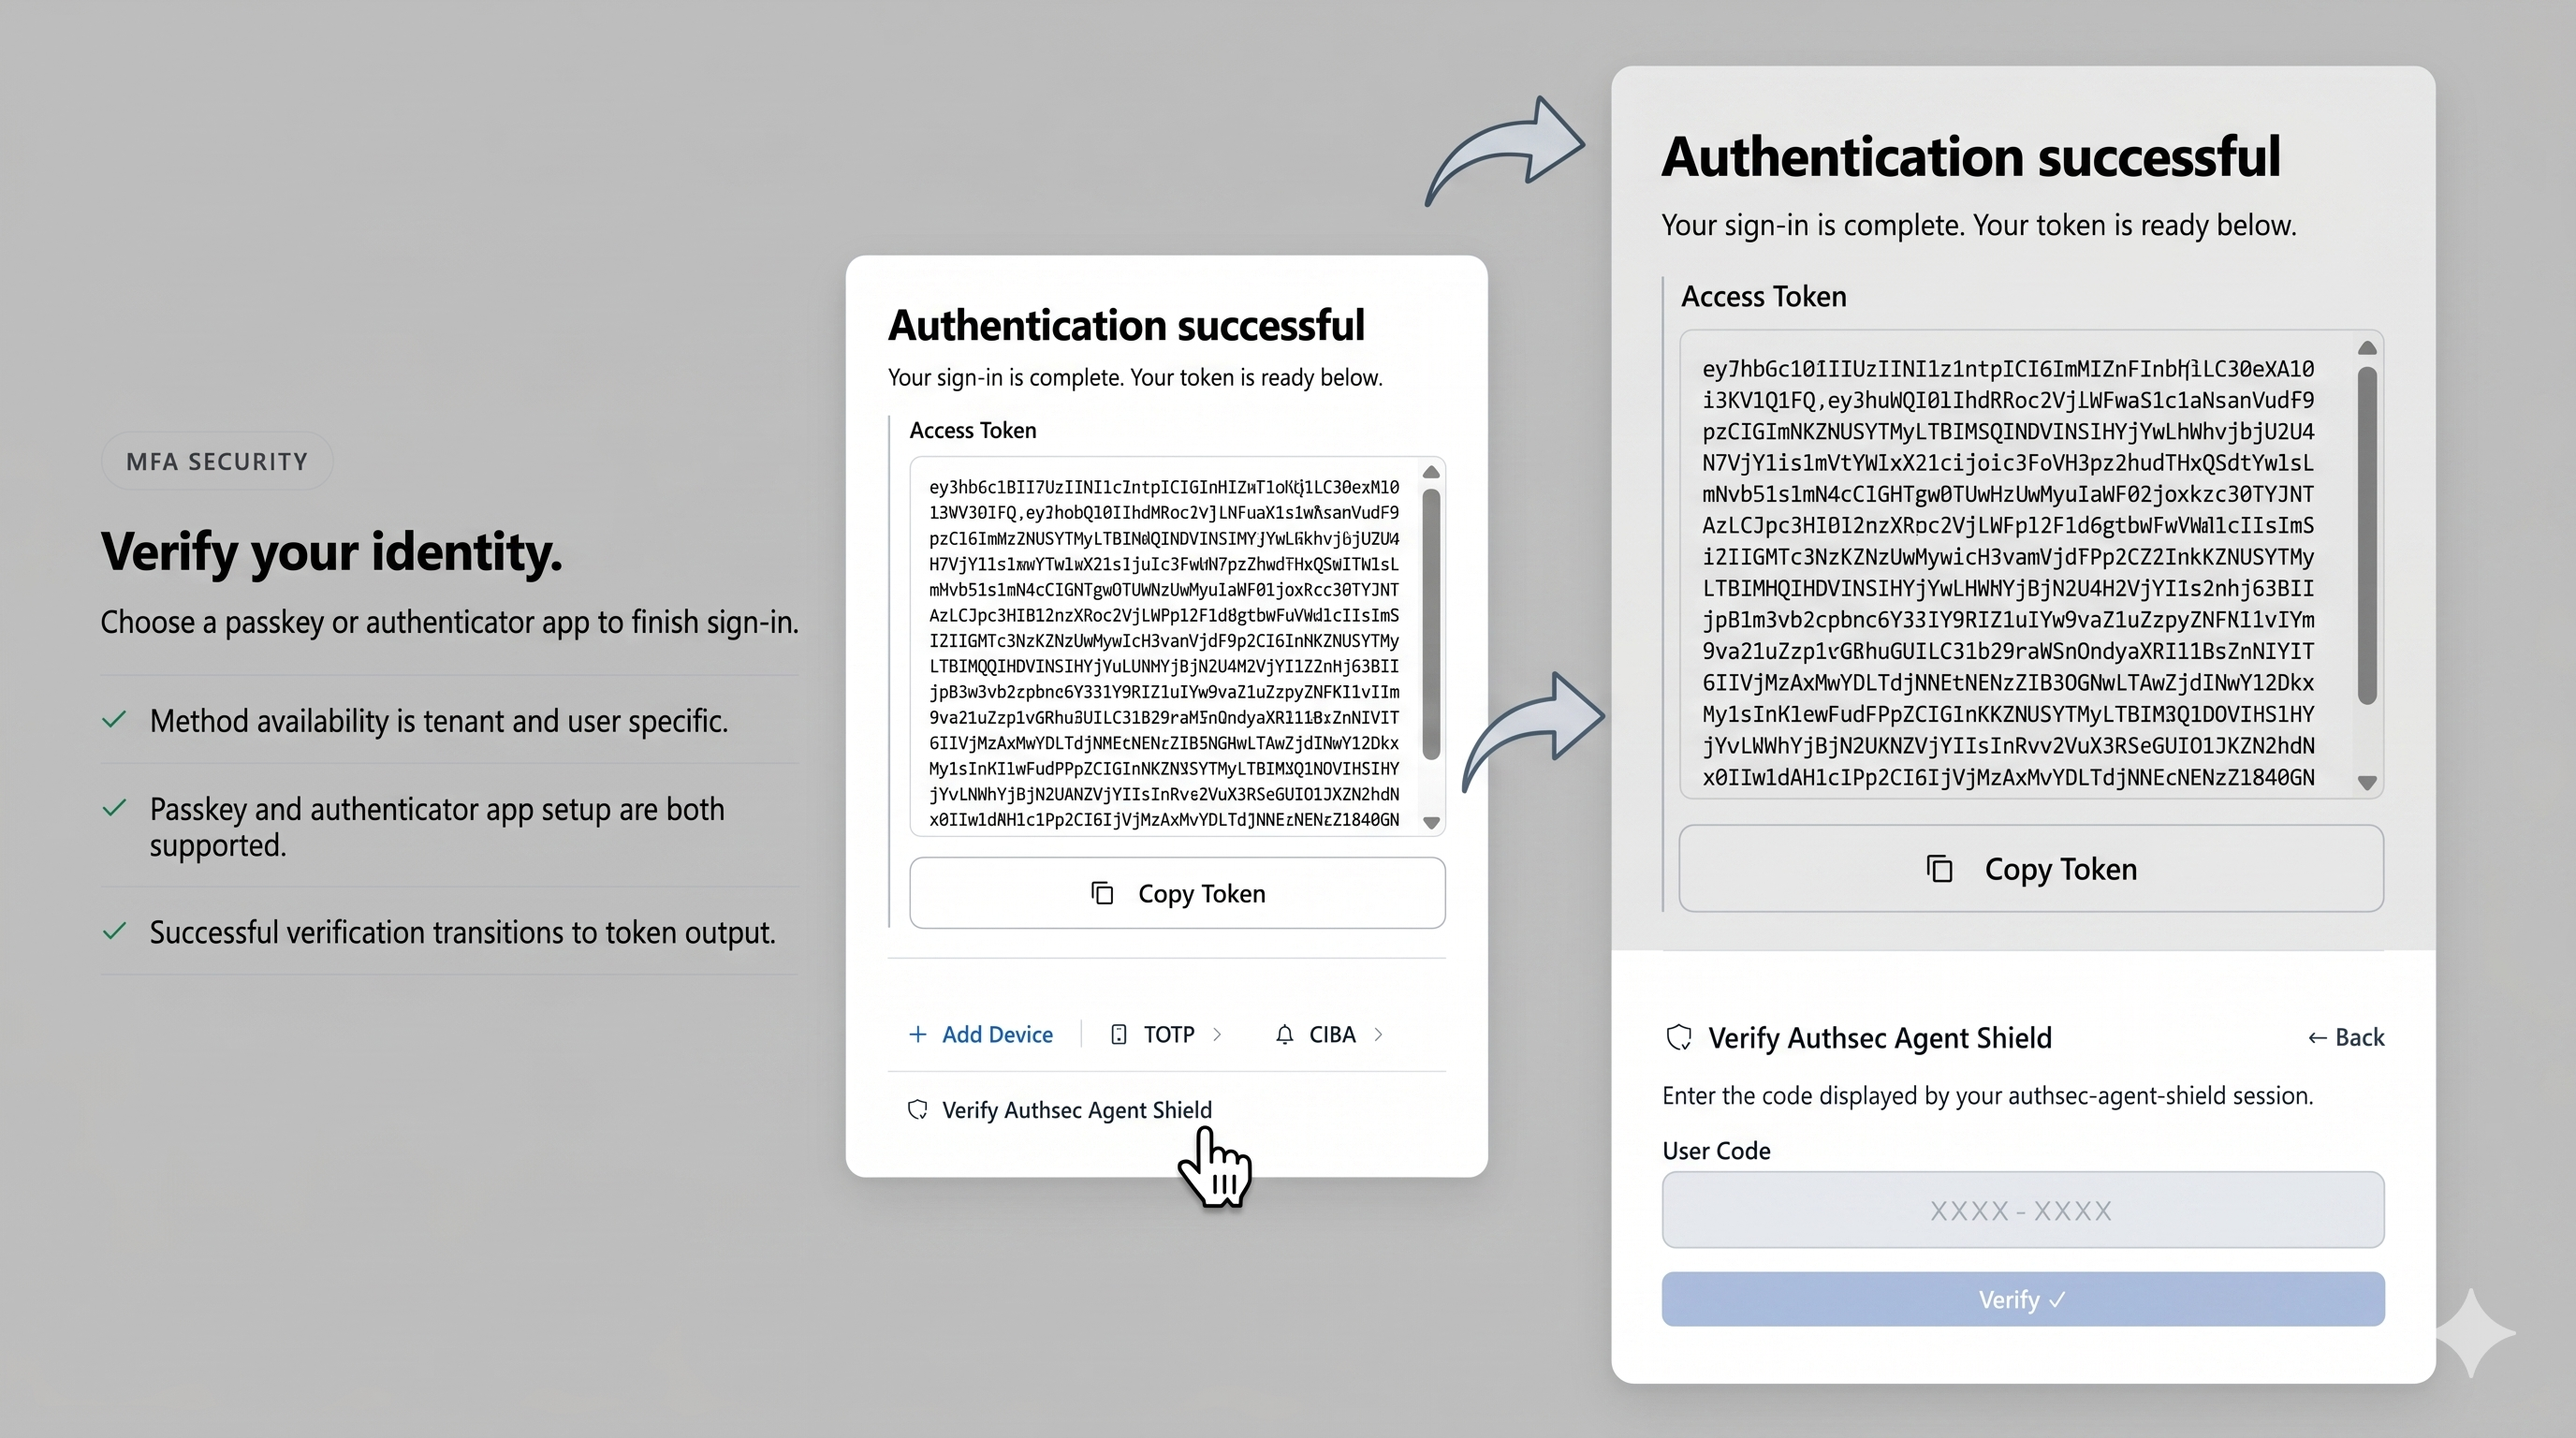
.\shield.exe login./authsec-shield loginThe shield opens your browser to the AuthSec SSO login page. Sign in with your organization credentials. After signing in, a short activation code is displayed in your terminal.
Go to the AuthSec end-user platform (the URL will be shown in your terminal), enter the code displayed, and confirm the activation. Once you confirm, the shield receives your credentials automatically — no copy-pasting of tokens required.
After activation, the terminal will confirm that you are successfully logged in and your session is ready.
Step 4 — Install Protection Layers
The install command deploys all four protection layers on your machine.
On macOS/Linux, a single sudo command handles everything:
sudo ./authsec-shield installOn Windows, the process has two steps. First, install the hooks and command wrappers from a normal terminal:
.\shield.exe installThen open an Administrator PowerShell and run the shim installer:
.\install-shims.ps1Alternatively, launch both steps in one command from a normal terminal:
Start-Process powershell -Verb RunAs -ArgumentList "-NoExit", "-ExecutionPolicy", "Bypass", "-Command", "& {Set-Location 'C:\path\to\authsec-agent-shield'; .\install-shims.ps1}"Installation deploys four layers of protection:
- Binary Shims — replaces rm, git, docker, kubectl, mysql, psql with shield wrappers at the OS level. Every process on the machine is governed, including AI tools.
- Filesystem Protection — applies NTFS DENY write ACLs (Windows) or chattr locks (Linux) to sensitive directories: .ssh, .aws, .kube, .env.
- Shell Hooks — adds a PowerShell CommandValidationHandler for cmdlets like Remove-Item and Set-Content; Bash preexec via DEBUG trap; Zsh native preexec.
- MCP Proxy — a transparent JSON-RPC proxy that intercepts write_file, delete_file, and execute_command tool calls from Claude Desktop, Codex, and Cursor before they reach MCP servers.
Step 5 — Verify with shield doctor
Once installation completes, run the diagnostics command to confirm every protection layer is active:
.\shield.exe doctor./authsec-shield doctorThe doctor command checks that binary shims are in place and pointing to the shield, that shell hooks are loaded in your active shell profiles, that filesystem ACLs are applied to sensitive directories, and that your authentication credentials are valid and not expired.
A healthy output shows all checks passing with green status indicators. If any check fails, the doctor output tells you exactly which layer is missing and the command to fix it.
Executing Commands — What Happens at Runtime
Once installed, the shield works silently in the background. You do not need to prefix commands or change your workflow.
Every command is scored locally with no network call. The scoring engine stacks risk signals — destructive verbs, force flags, sensitive paths, SQL statements — to produce a score from 0 to 100.
Commands scoring 30 or below pass instantly with zero latency. Commands scoring above 30 trigger a push notification to your phone via AuthSec CIBA. You approve or deny from the mobile app. Only after approval does the command execute.
Here is how common commands score in practice:
- ls, git status, docker ps, cat README.md — score 0. Pass instantly.
- git push (no flags) — score 30. Pass instantly (at threshold).
- rm file.txt — score 40. Blocked. Phone notification sent.
- git push --force origin main — score 100. Blocked immediately.
- rm -rf / — score 100. Blocked immediately.
- kubectl delete namespace production — score 100. Blocked immediately.
- mysql -e 'DROP TABLE users' — score 100. Blocked immediately.
Testing Risk Scores
You can dry-run the risk scorer against any command without executing it:
shield test "rm -rf /"shield test "git status"shield check is the internal variant used by shell hooks. Call it directly to evaluate any command string and see the full scoring breakdown:
shield check "<your command>"Use shield test to audit commands before running them, or to verify that your organization's policy thresholds are configured as expected.
Pausing and Re-enabling Protection
When you need to work freely — running a batch migration, doing a large file cleanup — you can pause protection for a set duration:
shield pause 1hshield pause 30mshield enableDuring a pause, all commands pass through unchecked. The pause is time-bounded — protection resumes automatically when the duration expires. Use shield status at any time to see whether protection is active or paused and how long remains.
Uninstalling
To fully remove Agent Shield from your machine, run the uninstall command from an Administrator PowerShell (Windows) or with sudo (macOS/Linux):
.\shield.exe uninstallsudo ./authsec-shield uninstallUninstall restores all original system binaries from their .shield-real backups, removes PowerShell and shell hooks from profile files, removes all NTFS DENY ACLs and chattr locks from protected directories, and deletes all shield configuration and credential files.